


Whenever I would adjust my desktop monitor's brightness as the day progressed, I opened a window, or I turned on/off a light in the room, I would think: if only this happened automatically... I'm manually changing the monitor brightness to a value directly related to the room's level of light!
I was already changing my monitor's brightness via its DDC/CI interface using ddcutil on Fedora, so I figured this could be achieved. I set out to build a software monitor brightness controller in Python that uses data from an Arduino-powered light sensor to correlate ambient light and backlight brightness. Now, as the system regularly reads the sensor data, my monitor will automagically change its brightness to reflect the room's level of ambient light—I call it: lighten. 💡
Here I will share how to go about setting up the hardware and software for this project, how it works, and what I learned along the way.
Setup
The hardware
For any of this to work, a ddcutil-controllable monitor must be used.
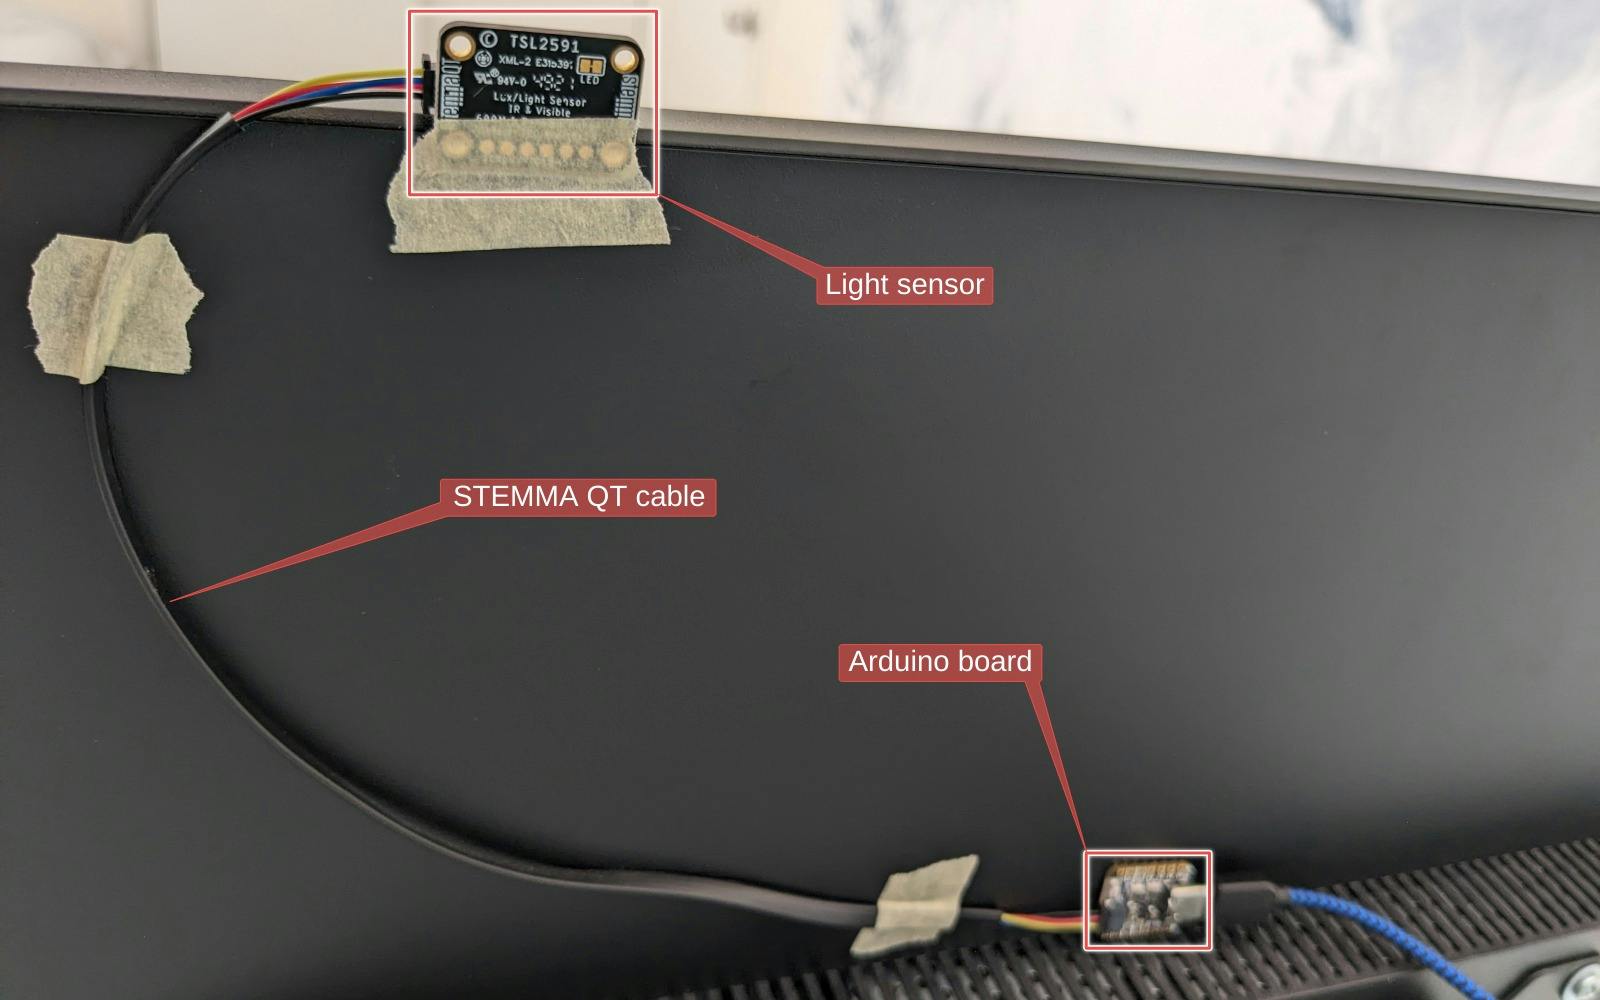
The hardware side of this project is composed of an Arduino board, a light sensor, and a means of connecting them.
I chose these components:
-
- This board has built-in support for the TinyUSB library
-
- This sensor is precise, allowing for exact lux calculations
-
- This cable is super convenient!
Simply connect the QT Py board to the light sensor with the STEMMA QT cable and position them behind your monitor with masking tape!
Behold the beautiful hack:
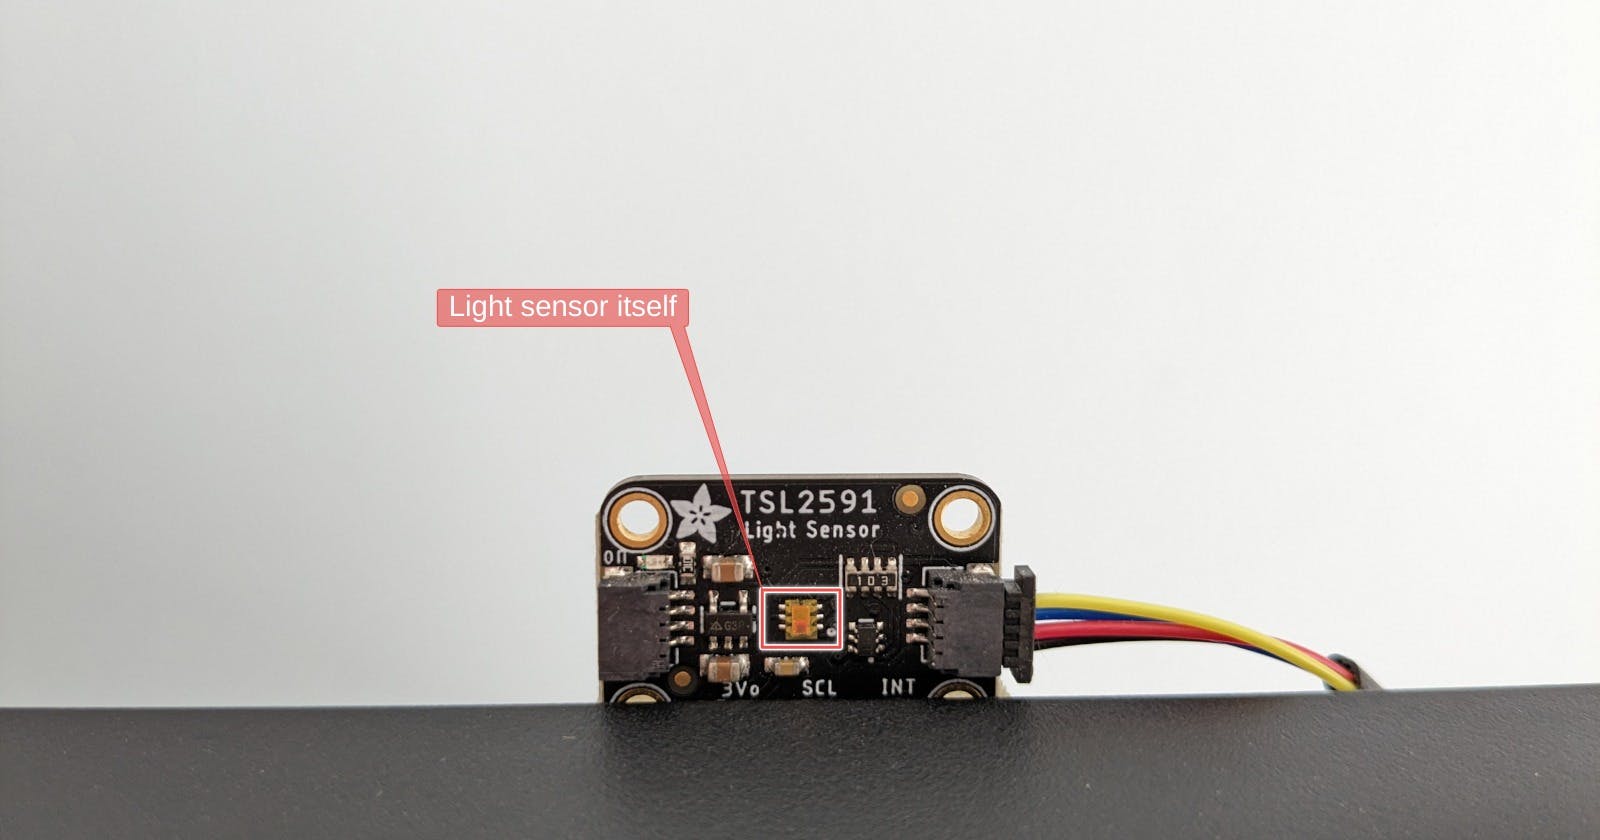
Remember to keep the light sensor itself exposed:
Power and receive data from the Arduino with a USB-C to USB cable plugged into your computer.
The software
The Arduino code to read the light sensor data and the system-side controller are open-source.
This process requires a working Arduino IDE, basic knowledge of uploading sketches, and experience with the Linux command line.
Arduino
The Arduino code can be found here: arduino-lighten. It requires the following libraries:
Adafruit TinyUSB (The board used should have built-in support for this library)
This tutorial explains how to set up the first two.
The TinyUSB library can be installed similarly:
In the Arduino IDE menus, go to Sketch -> Include Library -> Manage Libraries, then search for and install Adafruit TinyUSB.
Now clone the arduino-lighten repo:
git clone https://github.com/jcrd/arduino-lighten.git
Open the arduino-lighten.ino file in the Arduino IDE and upload it to the board.
Next, appropriate udev rules must be configured to access the HID device.
Create a .rules file in /etc/udev/rules.d that looks like:
SUBSYSTEM=="usb", ATTR{idVendor}=="239a", ATTR{idProduct}=="8111", MODE="0660", GROUP="plugdev", TAG+="uaccess", TAG+="udev-acl"
KERNEL=="hidraw*", ATTRS{idVendor}=="239a", ATTRS{idProduct}=="8111", MODE="0660", GROUP="plugdev", TAG+="uaccess", TAG+="udev-acl"
where the idVendor and idProduct attributes reflect the values found using lsusb:
 > lsusb
 Bus 005 Device 002: ID 239a:8111 Adafruit QT Py ESP32-S2
Here the vendor ID is 239a and the product ID is 8111.
See this section of the hidapi Python library documentation for more information.
lighten
lighten runs on your Linux computer and controls your monitor's brightness with ddcutil.
This tool requires read/write access to /dev/i2c video card devices. In order to use it without root permissions:
Add user to
i2cgroup:sudo usermod <user-name> -aG i2cCopy ddcutil's udev rule into place:
sudo cp /usr/share/ddcutil/data/45-ddcutil-i2c.rules /etc/udev/rules.dReload and trigger the new rule:
 sudo udevadm control --reload
 sudo udevadm trigger
See this document for more information.
Now, let's set up lighten. It's currently available as an RPM package on Fedora, but it should be compatible with any Linux distro if installed from source!
Install with copr:
 dnf copr enable jcrd/lighten
 dnf install lighten
lighten requires the product and vendor ID of the Arduino HID device. These are the same values we found previously using
lsusb, i.e.239aand8111. Create a new file at~/.config/lighten/lightend.confwith this content:[sensor] vendor_id=239a product_id=8111Enable the daemon's
systemdservice:systemctl --user enable --now lightendIf the command above succeeds, everything should be operational!
How it works
lighten makes no assumptions about what monitor brightness value corresponds to an ambient light reading. The daemon, lightend, runs in the background and records manual changes to monitor brightness made with the client, lighten, until it's able to guess which values are appropriate.
lighten is used to adjust monitor brightness like this:
lighten set - 10 # decrease brightness by 10
lighten set + 20 # increase brightness by 20
lighten set = 100 # set brightness to max
Over time, lighten builds up a database of the ideal monitor brightness in relation to the ambient light level based on your adjustments, and restores brightness:
when ambient light changes significantly
on demand
at startup
upon wakeup from sleep
at regular intervals as time passes
Update: If appropriate, lighten can set the monitor brightness to the value detected by the sensor, so that a sensor value of 100 corresponds to 100 monitor brightness. This is enabled by setting the normalize_mode configuration option to true.
What I learned
I learned how to implement and interface with an HID device using TinyUSB and python-hid after trying and failing to maintain a serial connection to the Arduino board upon the computer waking up from suspension.
I also learned how to use GLib via PyGObject to run a main loop with custom GSources alongside a DBus server all in Python. I found only scattered documentation about this, so I wrote about building a D-Bus service in Python here!